Step 1: Disconnect & Vacuum (The Setup)
Safety First: Unplug the dryer from the wall.
Gain Access: Carefully pull the dryer away from the wall. Disconnect the flexible duct tube (usually aluminum or plastic) from the back of the dryer.
Initial Clean: Use your vacuum’s crevice tool to thoroughly clean the dryer’s exhaust outlet and the inside of the flexible duct. Remove as much lint as you can see.
Step 2: The « Grandma Hack » – Blow It Out
This is the core of the trick.
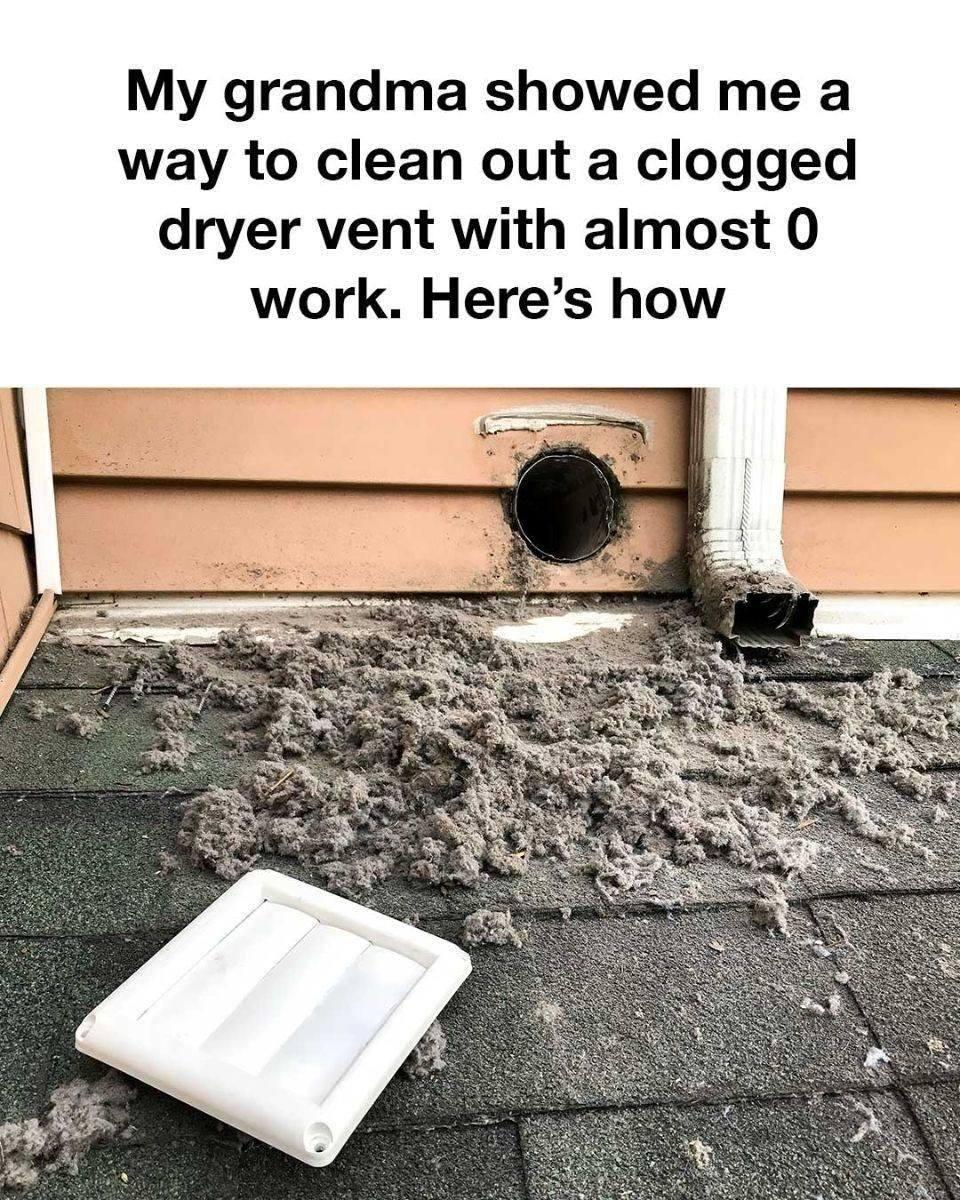
Go outside and locate the exterior dryer vent cover (the louvered flap on your home’s exterior).
Open the flap and remove any visible lint or debris by hand.
Insert the leaf blower nozzle into the vent opening from the outside. Seal the area around it with a rag if possible to maximize air pressure.
Turn on the leaf blower for 30-60 seconds. The powerful burst of air will travel backward through the ductwork, forcefully dislodging packed lint and blowing it back toward the dryer.
Step 3: Final Cleanup & Reassembly
Go back inside. The lint dislodged by the leaf blower will now be in the cavity behind your dryer or in the disconnected duct.
Use the vacuum to clean out this area thoroughly.
Reconnect the flexible duct to the dryer and the wall vent, ensuring all connections are snug (avoid crushing the duct).
Plug the dryer back in and push it gently into place, being careful not to kink the duct.
Run a test cycle. You should notice improved airflow out of the exterior vent and potentially faster drying times.